[React-Native] React-Native-Vision-Camera 2 ( Class 형태 )
함수형을 class로 변환하고 여러 기능들을 추가하면서 조금 늦어진 감이 있지만 삭제 기능, 등록 기능, 디자인 개선까지 완료하였습니당 아직 부족하지만 포스팅 해보려고 해요!
프로젝트가 class 형태로 진행되는 것도 있고 정확히 어떻게 작동하는지 정확하게 알 필요가 있다고 생각하여 함수형 형태를 class로 바꾸어보았습니다.
함수형 형태 안에서는 hook을 사용할 수 있는데 class 안에서는 hook을 사용할 수 없습니다. 하지만 hook 기능을 사용할 수 없는것은 아닙니다. (useState, useEffect, useRef 를 사용할 수 없습니다.)
먼저 각각의 특성을 파악 후 class로 변환하도록 하였습니다.
useState
클래스형 컴포넌트는 state를 사용하고, 함수형 컴포넌트는 useState 훅(클래스 내부에서는 동작 X)을 사용한다.
함수에서 state 변수를 설정하는 방법, class에서는 this.state로 설정함
- 함수형
const [imageURL, setImageURL] = useState([]);- class 형
constructor(props) {
    super(props);
    this.state = {
      cnt: 0  //초기화 0
    };
  }
state변수는 상태변수로서 변수 값이 바뀔 때 리렌더링 된다.
useEffect
{ componentDidMount, componentDidUpdate, componentWillUnmount } 가 합쳐진것
useEffect는 컴포넌트가 랜더링 이후에 어떤 일을 수행해야하는 지를 말한다.
useEffect(() => {
    console.log('컴포넌트가 처음화면에서 보여질 때');

    return () => { // return은 뒷정리함수 즉, componentWillUnmount에 해당
      console.log('컴포넌트가 화면에서 사라질 때');
    };
  }, []); // deps배열(의존성 배열..?)
useRef
여러요소 중에서 <input>요소를 제어할 때 많이 사용된다.
constructor(props) {
    super(props);
    this.ref = React.createRef();
  }
위와같이 만들어 ref를 console.log로 찍어보면
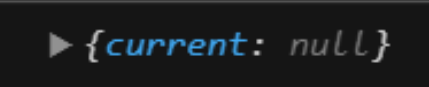
current속성을 가진 ref 객체가 생성된다.
함수형에서 ref를 사용하려면 useRef를 사용해야 한다.
const refContainer = useRef(initialValue);
useRef는 current 속성을 가지고있는 객체를 initialValue로 초기화시켜 ref 객체를 반환한다.
**useRef 함수에 선언한 변수는 값이 변해도 리렌더링 하지 않는다.
Constructor
constructor(props) {
        super(props);

        this.camera = React.createRef();
        this.devices = [];
        this.state = {
            imageURLs: null,
            imageURL: null,
            device: null,
            modal: false,
            imageInputValue:null,
        }
}- useRef ⇒ React.createRef();
class에서 useRef를 사용하고 싶을시 React.createRef()를 사용
ComponentDidMount
componentDidMount() {
        this.availableCameraDevices().then((select) => {
            this.setState({ device: select });
        });
    }

    async availableCameraDevices() {
        this.devices = await Camera.getAvailableCameraDevices();
        //console.log(this.devices);
        const sorted = this.devices.sort(this.devices.devices);
        return {
            back: sorted.find((d) => d.position === "back"),
            front: sorted.find((d) => d.position === "front")
        }
    }
문서가 불친절하여 많이 헤맸다... filtered는 class로 어떻게 바꾸어야할지 감이 안잡혀 바꾸지 않고 진행하였는데
fitered까지 했다면 더욱 완벽했을까싶다.
back 은 후면카메라 , front는 전면카메라
참고자료
https://github.com/mrousavy/react-native-vision-camera/discussions/826
https://mrousavy.com/react-native-vision-camera/docs/api/classes/Camera#getavailablecameradevices
Class: Camera | VisionCamera
A powerful `` component.
mrousavy.com
//api에서 제시하는 사용 예시
const devices = await Camera.getAvailableCameraDevices()
const filtered = devices.filter((d) => matchesMyExpectations(d))
const sorted = devices.sort(sortDevicesByAmountOfCameras)
return {
  back: sorted.find((d) => d.position === "back"),
  front: sorted.find((d) => d.position === "front")
}
handleModal
handleModal = () => {
        this.setState({
            modal: this.state.modal ? false : true,
        });
    }
FlatList로 뿌려진 사진들을 모달을 통해 선택한 사진을 크게 볼 수 있게 하였다.
render
render() {
        if (this.state.device == null) return (<></>);
        return (
            <View style={styles.container}>

                <View style={styles.viewHeaderLayout}>
                    <FlatList
                        data={this.state.imageURLs}
                        renderItem={(item) => <ImageRender image={item} imageModal={this.handleModal} imageRemove={(index) => this.imageRemove(index)} />}
                        horizontal={true} // 가로정렬
                    />
                </View>

                <View style={styles.viewBodyLayout}>
                    <Camera
                        ref={this.camera}
                        style={StyleSheet.absoluteFill}
                        device={this.state.device.back}
                        isActive={true}
                        photo={true}
                    />
                    <Modal visible={this.state.modal}>
                        <View>
                            <FlatList
                                data={this.state.imageURLs}
                                renderItem={(item) => <ImageModal image={item} imageModal={this.handleModal} imageRemove={(index) => this.imageRemove(index)} />}
                                horizontal={true} // 가로정렬
                            />
                        </View>
                    </Modal>
                </View>

                <View style={styles.viewBottomLayout}>
                    <View style={styles.pictureLayout}>
                         <TouchableOpacity style={styles.btn_picture} onPress={this.pictureButton}>
                             <IconPicture name="picture" size={40} color="white"></IconPicture>
                        </TouchableOpacity>
                    </View>
                    <View style={styles.cameraLayout}>
                        <TouchableOpacity style={styles.btn_camera} onPress={this.onPressButton}>
                            <IconCircle name="circle-thin" size={65} color="#C0C0CE"></IconCircle>
                        </TouchableOpacity>
                    </View>
                    <View style={styles.putLayout}>
                        <TouchableOpacity style={styles.btn_put} onPress={this.uploadimg}>
                            <Text style={styles.text}>등 록</Text>
                        </TouchableOpacity>
                    </View>
                </View>
                {/*<Text>{this.state.imageURLs}</Text>*/}

            </View>
        );
    }
Flatlist로 뿌려준 이미지를 보여주는 class는 ImageRender으로 이너 클래스를 만들어주었다.
ImageRender
class ImageRender extends Component {
    constructor(props) {
        super(props);
    }

    render() {
        const imagePath = this.props.image.item;
        const imageIndex = this.props.image.index;
        const imageRemove = this.props.imageRemove;

        return (
            <TouchableOpacity style={styles.touchableStyle} onPress={this.props.imageModal}>
                <View style={styles.viewStyle}>
                    <ImageBackground source={{ uri: imagePath }} style={styles.image}>
                        <TouchableOpacity onPress={() => this.props.imageRemove(imageIndex)}>
                            <IconDelete name="x" size={30}></IconDelete>
                        </TouchableOpacity>
                    </ImageBackground>
                </View>
            </TouchableOpacity >
        )
    }
}
props로 받아온 ImageURLs의 값들로 uri를 통해 사진들을 나오게 한다.
ImageModal
class ImageModal extends Component {
    constructor(props) {
        super(props);
    }

    render() {
        const imagePath = this.props.image.item;
        const imageIndex = this.props.image.index;

        return (
            <TouchableOpacity style={styles.touchableModalStyle} onPress={this.props.imageModal}>
                <View style={styles.viewStyle}>
                    <ImageBackground source={{ uri: imagePath }} style={StyleSheet.absoluteFill}>
                        <TouchableOpacity onPress={() => this.props.imageRemove(imageIndex)}>
                            <IconDelete name="x" size={50}></IconDelete>
                        </TouchableOpacity>
                    </ImageBackground>
                </View>
            </TouchableOpacity >
        )
    }
}
선택한 사진을 눌렀을 때 상세하게 볼 수 있는 모달
전체코드 ( VisionCameraView )
import React, { Component } from 'react';
import { StyleSheet, View, Button, Text, Image, FlatList, TouchableOpacity, ImageBackground, Modal } from 'react-native';
import { Camera } from 'react-native-vision-camera';


import {styles} from "../style/visioncamera_style"
import IconDelete from 'react-native-vector-icons/Feather';
import IconCircle from "react-native-vector-icons/FontAwesome";
import IconPicture from "react-native-vector-icons/SimpleLineIcons";

class VisionCamFlat extends Component {
    constructor(props) {
        super(props);

        this.camera = React.createRef();
        this.devices = [];
        this.state = {
            imageURLs: [],
            device: null,
            modal: false,
            imageInputValue:null,
        }
    }

    componentDidMount() {
        this.availableCameraDevices().then((select) => {
            this.setState({ device: select });
        });
    }

    async availableCameraDevices() {
        this.devices = await Camera.getAvailableCameraDevices();
        const sorted = this.devices.sort(this.devices.devices);
        return {
            back: sorted.find((d) => d.position === "back"),
            front: sorted.find((d) => d.position === "front")
        }
    }

    onPressButton = async () => {
        const photo = await this.camera.current.takeSnapshot({
            flash: 'off',
        })
        this.setState({ imageURLs: this.state.imageURLs.concat('file://' + photo.path) })
    }

    uploadimg = () => {
        this.props.navigation.navigate('UploadImg', {imageInputValue:this.state.imageURLs});
        console.log(this.state.imageURLs)
    }
    // 이미지 모달 표시 여부
    handleModal = () => {
        this.setState({
            modal: this.state.modal ? false : true,
        });
    };

    // 이미지 삭제
    imageRemove = (index) => {
        console.log(index);
        this.setState({
            imageURLs: this.state.imageURLs.filter((value, indexNum) => indexNum !== index)
        });
        console.log('삭제완료');
    };

    render() {
        if (this.state.device == null) return (<></>);
        return (
            <View style={styles.container}>

                <View style={styles.viewHeaderLayout}>
                    <FlatList
                        data={this.state.imageURLs}
                        renderItem={(item) => <ImageRender image={item} imageModal={this.handleModal} imageRemove={(index) => this.imageRemove(index)} />}
                        horizontal={true} // 가로정렬
                    />
                </View>

                <View style={styles.viewBodyLayout}>
                    <Camera
                        ref={this.camera}
                        style={StyleSheet.absoluteFill}
                        device={this.state.device.back}
                        isActive={true}
                        photo={true}
                    />
                    <Modal visible={this.state.modal}>
                        <View>
                            <FlatList
                                data={this.state.imageURLs}
                                renderItem={(item) => <ImageModal image={item} imageModal={this.handleModal} imageRemove={(index) => this.imageRemove(index)} />}
                                horizontal={true} // 가로정렬
                            />
                        </View>
                    </Modal>
                </View>

                <View style={styles.viewBottomLayout}>
                    <View style={styles.pictureLayout}>
                         <TouchableOpacity style={styles.btn_picture} onPress={this.pictureButton}>
                             <IconPicture name="picture" size={40} color="white"></IconPicture>
                        </TouchableOpacity>
                    </View>
                    <View style={styles.cameraLayout}>
                        <TouchableOpacity style={styles.btn_camera} onPress={this.onPressButton}>
                            <IconCircle name="circle-thin" size={65} color="#C0C0CE"></IconCircle>
                        </TouchableOpacity>
                    </View>
                    <View style={styles.putLayout}>
                        <TouchableOpacity style={styles.btn_put} onPress={this.uploadimg}>
                            <Text style={styles.text}>등 록</Text>
                        </TouchableOpacity>
                    </View>
                </View>
                {/*<Text>{this.state.imageURLs}</Text>*/}

            </View>
        );
    }
}

class ImageRender extends Component {
    constructor(props) {
        super(props);
    }

    render() {
        const imagePath = this.props.image.item;
        const imageIndex = this.props.image.index;
        const imageRemove = this.props.imageRemove;

        return (
            <TouchableOpacity style={styles.touchableStyle} onPress={this.props.imageModal}>
                <View style={styles.viewStyle}>
                    <ImageBackground source={{ uri: imagePath }} style={styles.image}>
                        <TouchableOpacity onPress={() => this.props.imageRemove(imageIndex)}>
                            <IconDelete name="x" size={30}></IconDelete>
                        </TouchableOpacity>
                    </ImageBackground>
                </View>
            </TouchableOpacity >
        )
    }
}

class ImageModal extends Component {
    constructor(props) {
        super(props);
    }

    render() {
        const imagePath = this.props.image.item;
        const imageIndex = this.props.image.index;

        return (
            <TouchableOpacity style={styles.touchableModalStyle} onPress={this.props.imageModal}>
                <View style={styles.viewStyle}>
                    <ImageBackground source={{ uri: imagePath }} style={StyleSheet.absoluteFill}>
                        <TouchableOpacity onPress={() => this.props.imageRemove(imageIndex)}>
                            <IconDelete name="x" size={50}></IconDelete>
                        </TouchableOpacity>
                    </ImageBackground>
                </View>
            </TouchableOpacity >
        )
    }
}

export default VisionCamFlat;
CSS (visioncamera_style.js)
import {StyleSheet} from 'react-native';

export const styles = StyleSheet.create({
    container:{
      flex:1,
      backgroundColor:'black',
    },

    row:{
      flex:1,
      padding:5,
      width: 160,
      height: 100,
      borderWidth:1,
      borderColor:"#DDDDDD",
      backgroundColor:'skyblue',
      margin:5,
      flexDirection:'row'
    },
    image:{
      flex:1,
      width:160,
      height:100,
    },
    imageLo:{
      flex:1,
      justifyContent:'flex-start',
      //borderWidth:1,
    },
    TextLo:{
      flex:1,
      padding:10,
      //textAlign:'right', // 텍스트 정렬
      //borderWidth:1,
    },
    viewStyle:{
      flex:1,
      justifyContent:'flex-start',
      //borderWidth:1,
    },
    viewHeaderLayout:{
      flex:2,
      justifyContent:'center',
      marginBottom:5
    },
    viewBodyLayout:{
      flex:7,
    },
    viewBottomLayout:{
      flex:0.5,
      flexDirection:'row',
      marginTop:30,
      marginLeft:30,
      marginRight:30,
      marginBottom:30
    },

    pictureLayout:{
      flex:1,
      alignItems:'flex-start',
      justifyContent:'center',
    },
    cameraLayout:{
      flex:1,
      alignItems:'center',
      justifyContent:'center',
    },

    putLayout:{
      flex:1,
      alignItems:'flex-end',
      justifyContent:'center',
    },

    btn_picture:{
      width:40,
      height:40,
      alignItems:'center',
      justifyContent:'center',
    },
    btn_camera:{
      width:65,
      height:65,
      //backgroundColor:"#C0C0CE",
      backgroundColor:"white",
      alignItems:'center',
      justifyContent:'center',
      borderRadius: 50,
    },
    btn_put:{
      width:60,
      height:35,
      backgroundColor:"#F1F1F3",
      alignItems:'center',
      justifyContent:'center',
      borderRadius: 10,
    },
    btn_xicon:{
      alignItems:'right',

    },
    buttonStyle:{
      width:100,
      height:38,
      margin:5,
      borderWidth:1,
    },
    touchableStyle:{
      flex : 1,
      width:160,
      height:100,
      margin:5,
    },
    text:{

      fontSize:15,
      color:"black",
    },
    touchableModalStyle:{
      flex : 1,
      width:380,
      height:580,
      margin:5,
    },
    imageBig:{
      flex:1,
      width:380,
      height:600,
    },
  });

  export default styles;
다음은 등록버튼을 눌렀을 때 사진이 등록이 되며 서버로 전송하는 것까지 포스팅 해보겠습니다.