
| 일 | 월 | 화 | 수 | 목 | 금 | 토 |
|---|---|---|---|---|---|---|
| 1 | 2 | 3 | ||||
| 4 | 5 | 6 | 7 | 8 | 9 | 10 |
| 11 | 12 | 13 | 14 | 15 | 16 | 17 |
| 18 | 19 | 20 | 21 | 22 | 23 | 24 |
| 25 | 26 | 27 | 28 | 29 | 30 | 31 |
- react-native
- Flatlist
- 모달에서뒤로가기
- TextInput
- 리액트
- fcm push
- JSON
- 리액트네이티브
- 리액트 네이티브
- vision-camera
- 모달
- React
- C++98에러
- algorithm
- 순열
- ReactNative
- asyncstorage
- 자동로그인
- 알고리즘
- modal
- 2023년 정처기 필기
- 가격자릿수
- makePermutation
- API
- fcm 푸시
- 페이지리렌더링
- 재귀함수
- Icon
- 뒤로가기구현
- touchableopacity
- Today
- Total
생각은 길게 코딩은 짧게
[React-Native] Json 파일 가져오기 본문
React에서 해보았던 Json파일 가져오기를 React-Native에서도 해보았어요!
Client와 Server간의 Data 교환은 request와 response message를 통해 이루어집니다.
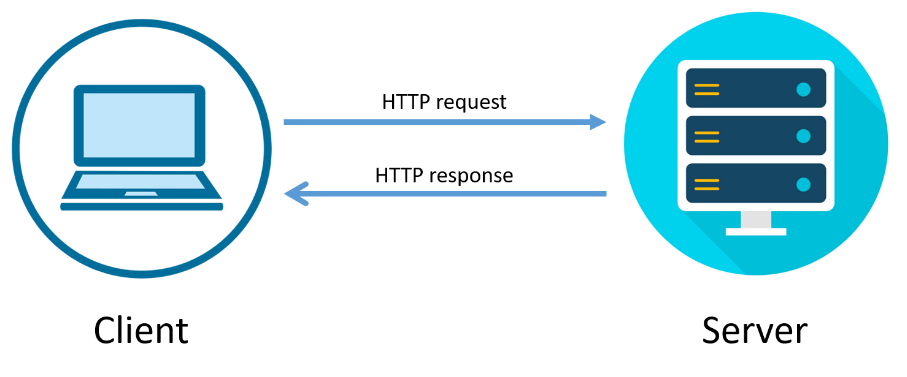
Client는 Server에 있는 Data를 받기 위해 request message를 요청하게 됩니다.
이후 Server는 요청 받은 request message를 통해 response message로 응답을 하게 됩니다.

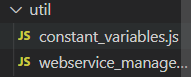
constant_variables.js ( URL을 포함하고 있습니다 )
export default class Constant {
    static serviceURL = "http://,,,/goods";
}
webservice_manager.js (스레드)

Http Post 형식의 Request Message 중 Multipart/Form-Data 의 구조 ( 이해를 돕기 위해 첨부한 것입니다 )
class WebServiceManager{
    #url;
    #method;
    #formDatas;
    #binaryDatas;
    #headerData;
    #credentials;
    #listener;


    constructor(url,method,listener) {
        this.#listener=listener;
        this.#url=url;
        this.#method=method;
        this.#formDatas={};
        this.#binaryDatas={};
        this.#headerData={};
        this.#credentials='omit';
    }

    addFormData(key,data) {
        this.#formDatas[key]=data;
    }

    addBinaryData(key,data) {
        this.#binaryDatas[key]=data;
    }

    addHeader(key,data) {
        this.#headerData[key]=data;
    }

    setCredentials(data) {
        this.#credentials=data;
    }

    async start() {
        var response;
        if(this.#method==='post' || this.#method==='POST') {
            let bodyData = new FormData();
            for(const [key,value] of Object.entries(this.#formDatas))
                bodyData.append(key,JSON.stringify(value));

            for(const [key,value] of Object.entries(this.#binaryDatas))
                bodyData.append(key,value);

            response = await fetch(this.#url,{method:this.#method,body:bodyData,headers:this.#headerData,credentials:this.#credentials})
            .catch(()=>{const listener = this.#listener.bind(); listener();});
        }
        else {
            response = await fetch(this.#url,{headers:this.#headerData,credentials:this.#credentials})
            .catch(()=>{const listener = this.#listener.bind(); listener();});
        }

        if(response.ok)
            return response;
    }
}

export default WebServiceManager;
Request Message로 요청을 한 형식으로 서버는 Response Message를 보내줍니다.
Response Message에서 우리가 쓰고자 하는 데이터들을 편하게 사용하기 위해 Webservice_manager를 사용합니다.
Webservice_manager에서 반복문을 통해 formDatas와 binaryDatas 를 추출한 것을 반환해줍니다.
Product.js
import React, { Component } from "react";

import { StyleSheet, Text, View } from 'react-native';
import Constant from "../util/constant_variables";
import WebServiceManager from "../util/webservice_manager";

class Product extends Component {

    constructor(props) {
        super(props);

        this.state={goodsContents:[]}
    }

    componentDidMount() {
        this.callGetRepairAPI().then((response) => {
            console.log(response);//response는 json자체
            this.setState({goodsContents:response.goods});
        });
    }

    async callGetRepairAPI() {
        let manager = new WebServiceManager(Constant.serviceURL+"/GetGoods");
        let response = await manager.start();
        console.log(response);//헤더포함한 response message
        if(response.ok)
            return response.json();
        else
            Promise.reject(response);
    }

    render() {
        return(
            <>
            <View>
                <Text>작성자</Text>
                <Text>상품명</Text>
                <Text>상품설명</Text>
                <Text>가격</Text>
            </View>

            {this.state.goodsContents.map((item,i)=><GetRepairList item={item} key={i}/>)}

            </>
        );
    }
}

class GetRepairList extends Component {
    constructor(props) {
        super(props);
    }

    render() {
        const item = this.props.item;
        return(

        <View>
            <View>
                <Text>name: {item.name}</Text>
            </View>
            <View>
                <Text>title: {item.title}</Text>
            </View>
            <View>
                <Text>content: {item.content}</Text>
            </View>
            <View>
                <Text>price: {item.price}</Text>
            </View>
        </View>

        )
    }
}

export default Product;
Webservice_manager를 통해 반환 된 data가 setState로 state 변수인 goodsContents 배열에 들어갑니다.
정리!
1. Client는 Server에게 request message를 보내서 Server에게 data를 요청
2. Server는 요청받은 request message 형식에 맞춰 response message로 응답
3. response message에서 webservice_manager를 통해 data 추출하여 Client가 사용
결과

json 데이터들을 가져온 것을 볼 수 있습니다 :) 나중에 Style 공부해서 추후 예쁘게 적용해보겠습니당 ~~
'React Native' 카테고리의 다른 글
| [React-Native] 간단한 Modal 구현 (2) | 2022.10.18 |
|---|---|
| [React-Native] React-Native Icon 적용 (0) | 2022.10.17 |
| [React-Native] React Navigation (1) | 2022.10.13 |
| [React-Native] FlatList로 Json 스크롤해서 보기 (0) | 2022.10.10 |
| [React-Native] 리액트 네이티브 환경설정 (0) | 2022.09.27 |


